Na primeira parte do artigo, usaremos o emulador QEMU para aarch64, na segunda parte, lançaremos o emulador Raspberry e verificaremos a funcionalidade do aplicativo nele.
Em meu próprio nome, quero observar que tudo isso não é feito rapidamente e, se você tentar fazer tudo isso, o ciclo completo levará vários dias!)
Construindo a partir de fontes Qt no CentOS ARM
Para instalar em um sistema host, precisamos instalar o emulador QEMU. Em distribuições baseadas em Debian, este é o pacote qemu-system-arm. Para gerenciar a máquina virtual em modo gráfico, você pode instalar o virt-manager.
Depois de iniciar, crie uma máquina virtual:
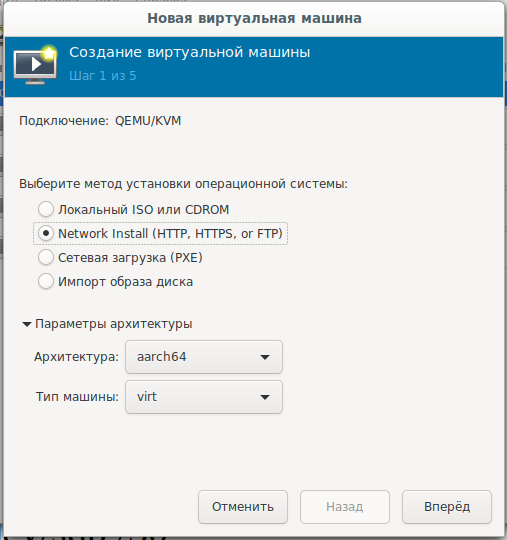
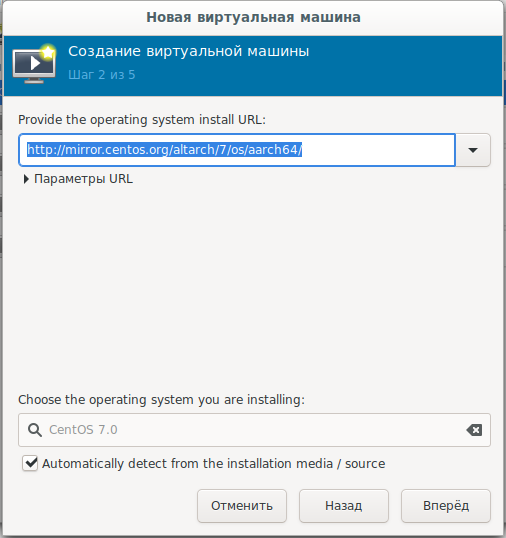
e selecione a rede de boot c url:
mirror.centos.org/altarch/7/os/aarch64 Defina o
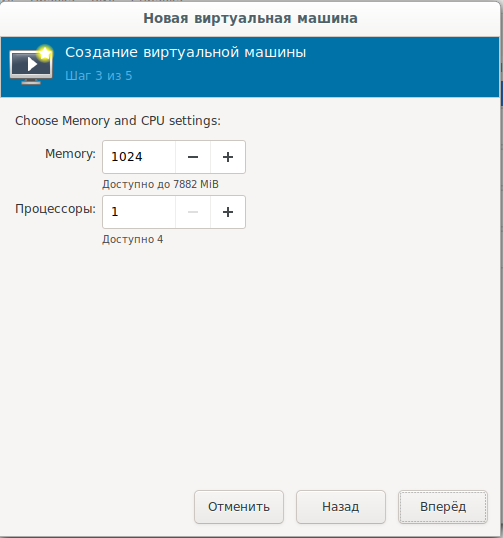
número de processadores e RAM:
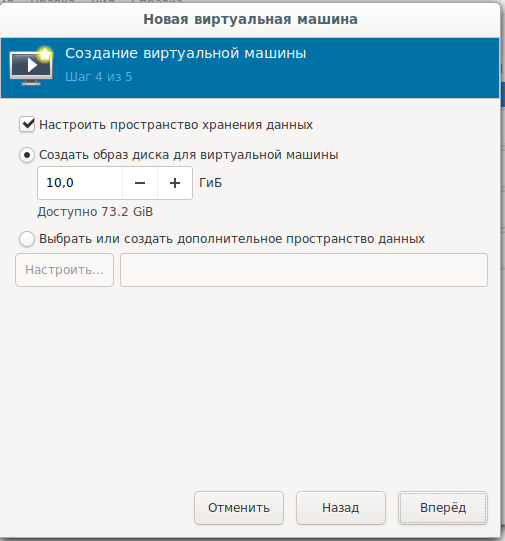
Defina o tamanho do disco do sistema:
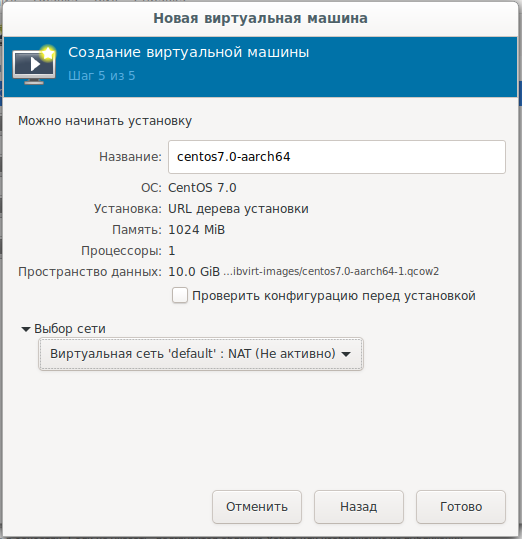
Configurações finais, seleção de rede:
Para quem deseja fazer o download ou instale offline, há uma imagem de disco:
arm64
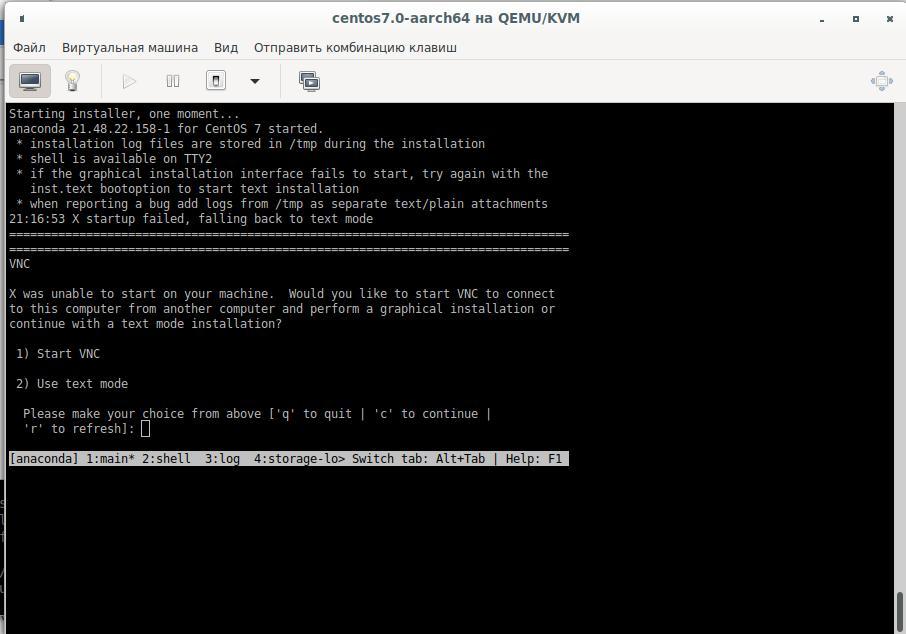
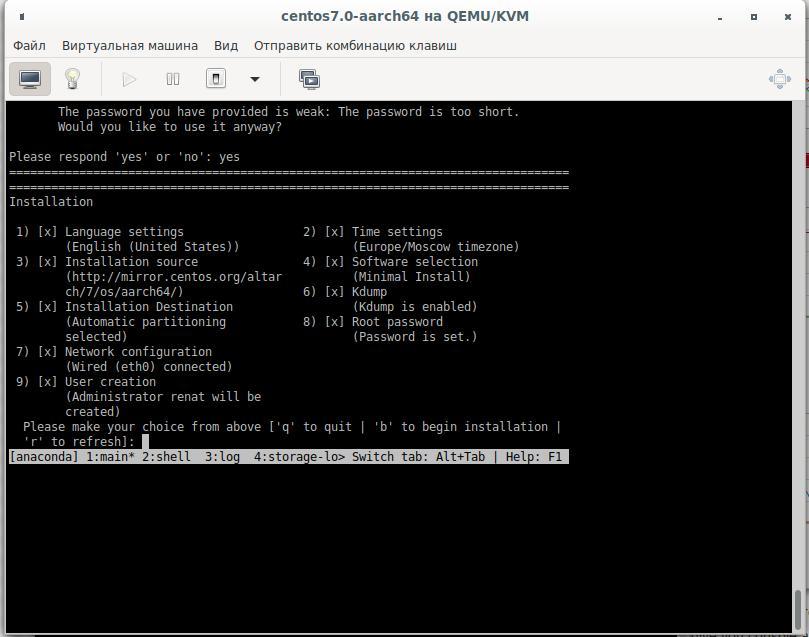
Em seguida, você precisa instalar o sistema no disco rígido em modo texto, escolhendo as opções de resposta necessárias e confirmando com respostas sim:
A montagem será feita no segundo disco virtual, para isso precisaremos de um disco de 25-30 Gb. Criamos um novo disco rígido desligando a máquina virtual e conectando-a a ela e, em seguida, começamos novamente. Vamos quebrar nosso disco rígido e formatá-lo:
cfdisk /dev/sdb
mkfs.ext4 /dev/sdb1 -L Qt_Rebuild
mount /dev/sdb1 /30
Por que o sistema de arquivos não é XFS
XFS, Raspberry, .. XFS.
Após a instalação, nos conectamos à máquina virtual e instalamos os pacotes de que precisamos :
yum install centos-release-scl
yum install devtoolset-9-gcc.aarch64
yum install git
export PATH=/opt/rh/devtoolset-9/root/bin/:$PATH
echo clone from git
cd /30
git clone --recursive --single-branch --branch 5.15 git://github.com/qt/qt5.git
cd qt5
Configurando:
./configure -skip qt3d -no-warnings-are-errors -release -recheck-all --prefix /Qt/5.15.0 -opensource -confirm-license -nomake examples -nomake tests -c++std c++17 -I /usr/include/xcb/ -L /usr/lib/x86_64-linux-gnu/ -xcb-xlib -xcb -feature-thread -feature-xkbcommon -qt-libpng -qt-libjpeg -qt-zlib -I /usr/include/xcb/ -L /usr/lib/x86_64-linux-gnu/ --recheck-all
...
You need perl in your PATH to make a build from GIT.
Cannot proceed.

#yum install perl
Repetimos o lançamento da configuração e obtemos:
Creating qmake...
gmake: g++: Command not found
gmake: *** [main.o] Error 127
Instale o compilador e configure novamente:
yum install devtoolset-9-gcc-c++.aarch64
...
ERROR: Feature 'xcb' was enabled, but the pre-condition 'features.thread && libs.xcb && tests.xcb_syslibs && features.xkbcommon-x11' failed.

ERROR: Feature 'xcb-xlib' was enabled, but the pre-condition 'features.xlib && libs.xcb_xlib' failed.

ERROR: Feature 'xkbcommon' was enabled, but the pre-condition 'libs.xkbcommon' failed.

ERROR: The OpenGL functionality tests failed!
You might need to modify the include and library search paths by editing QMAKE_INCDIR_OPENGL[_ES2],
QMAKE_LIBDIR_OPENGL[_ES2] and QMAKE_LIBS_OPENGL[_ES2] in the mkspec for your platform.
Procuramos e entregamos os pacotes necessários:
yum install libxkbcommon-x11-devel
yum install xcb-util-renderutil-devel
yum install libxcb libxcb-devel libXrender libXrender-devel xcb-util-wm xcb-util-wm-devel xcb-util xcb-util-devel xcb-util-image xcb-util-image-devel xcb-util-keysyms xcb-util-keysyms-devel
Nós configuramos e já obtemos um erro:
ERROR: Feature 'xcb-xlib' was enabled, but the pre-condition 'features.xlib && libs.xcb_xlib' failed.Adicione mais pacotes e veja o log de configuração:
 yum install libxcb libxcb-devel xcb-util xcb-util-devel mesa-libGL-devel libxkbcommon-devel
...
Checking for XCB ICCCM >= 0.3.9... yes
Checking for XCB SHM... yes
Checking for XCB Image >= 0.3.9... yes
Checking for XCB Keysyms >= 0.3.9... yes
Checking for XCB RandR... yes
Checking for XCB XRender... yes
Checking for XCB Renderutil >= 0.3.9... yes
Checking for XCB Shape... yes
Checking for XCB Sync... yes
Checking for XCB Xfixes... yes
Checking for XCB Xinerama... yes
Checking for XCB XKB... yes
Checking for XCB (extensions)... yes
Checking for xkbcommon >= 0.5.0... yes
Checking for xkbcommon-x11... yes
…
Checking for XCB Xlib... yes
Checking for XCB GLX... yes
...
Qt is now configured for building. Just run 'gmake'.
Once everything is built, you must run 'gmake install'.
Qt will be installed into '/Qt/5.15.0'.

Prior to reconfiguration, make sure you remove any leftovers from
the previous build.
Bem, está tudo pronto, mas precisamos verificar as opções que podem ser úteis para nós:
  OpenGL:
    Desktop OpenGL ....................... yes
    OpenGL ES 2.0 ........................ no
    OpenGL ES 3.0 ........................ no
    OpenGL ES 3.1 ........................ no
    OpenGL ES 3.2 ........................ no

  OpenSSL ................................ no
    Qt directly linked to OpenSSL ........ no
  OpenSSL 1.1 ............................ no
E ao mesmo tempo, provavelmente precisamos da interação de rede do aplicativo, não trabalhamos apenas via http:
yum install openssl-devel

Dependencies Resolved

================================================================================
 Package                   Arch          Version               Repository  Size
================================================================================
Installing:
 openssl-devel             aarch64       1:1.0.2k-19.el7       base       1.5 M
Installing for dependencies:
 keyutils-libs-devel       aarch64       1.5.8-3.el7           base        37 k
 krb5-devel                aarch64       1.15.1-46.el7         base       272 k
 libcom_err-devel          aarch64       1.42.9-17.el7         base        31 k
 libkadm5                  aarch64       1.15.1-46.el7         base       175 k
 libselinux-devel          aarch64       2.5-15.el7            base       186 k
 libsepol-devel            aarch64       2.5-10.el7            base        76 k
 libverto-devel            aarch64       0.2.5-4.el7           base        11 k
 pcre-devel                aarch64       8.32-17.el7           base       479 k
 zlib-devel                aarch64       1.2.7-18.el7          base        49 k

Transaction Summary
================================================================================
Install  1 Package (+9 Dependent packages)

Total download size: 2.8 M
Installed size: 6.4 M
Is this ok [y/d/N]:
Versão 1.0.2k, que é inferior ao que o Qt pede ( aumentou a versão mínima suportada do OpenSSL para 1.1. )
Teremos que construir o OpenSSL e então construir o Qt a partir da fonte:
wget https://www.openssl.org/source/openssl-1.1.1g.tar.gz
-bash: wget: command not found
cd /
curl https://www.openssl.org/source/openssl-1.1.1g.tar.gz -o openssl-1.1.1.g.tar.gz
tar -xvf openssl-1.1.1.g.tar.gz
cd /openssl-1.1.1g
perl Configure
echo   ,   ARM:
perl Configure linux-aarch64
Configuring OpenSSL version 1.1.1g (0x1010107fL) for linux-aarch64
Using os-specific seed configuration
Creating configdata.pm
Creating Makefile

**********************************************************************
***                                                                ***
***   OpenSSL has been successfully configured                     ***
***                                                                ***
***   If you encounter a problem while building, please open an    ***
***   issue on GitHub <https://github.com/openssl/openssl/issues>  ***
***   and include the output from the following command:           ***
***                                                                ***
***       perl configdata.pm --dump                                ***
***                                                                ***
***   (If you are new to OpenSSL, you might want to consult the    ***
***   'Troubleshooting' section in the INSTALL file first)         ***
***                                                                ***
**********************************************************************
make && make install
Em seguida, configure o Qt novamente e comece a construí-lo com o comando make ou make -j4 , de acordo com o número de processadores (se você decidir criar uma VM com 4 processadores) que são especificados nas configurações da máquina virtual .
A versão do aplicativo trava em:
make[3]: Entering directory `/30/qt5/qtsvg/src/svg'
g++ -c -include .pch/Qt5Svg -pipe -O2 -std=c++1z -fvisibility=hidden -fvisibility-inlines-hidden -fno-exceptions -Wall -Wextra -Wvla -Wdate-time -Wshift-overflow=2 -Wduplicated-cond -Wno-stringop-overflow -Wno-format-overflow -D_REENTRANT -fPIC -DQT_NO_LINKED_LIST -DQT_NO_FOREACH -DQT_NO_USING_NAMESPACE -DQT_NO_NARROWING_CONVERSIONS_IN_CONNECT -DQT_BUILD_SVG_LIB -DQT_BUILDING_QT -DQT_NO_CAST_TO_ASCII -DQT_ASCII_CAST_WARNINGS -DQT_MOC_COMPAT -DQT_USE_QSTRINGBUILDER -DQT_DEPRECATED_WARNINGS -DQT_DISABLE_DEPRECATED_BEFORE=0x050000 -DQT_DEPRECATED_WARNINGS_SINCE=0x060000 -DQT_NO_EXCEPTIONS -D_LARGEFILE64_SOURCE -D_LARGEFILE_SOURCE -DQT_NO_DEBUG -DQT_WIDGETS_LIB -DQT_GUI_LIB -DQT_CORE_LIB -DQT_ZLIB_LIB -I. -I../../include -I../../include/QtSvg -I../../include/QtSvg/5.15.0 -I../../include/QtSvg/5.15.0/QtSvg -I/30/qt5/qtbase/include/QtWidgets/5.15.0 -I/30/qt5/qtbase/include/QtWidgets/5.15.0/QtWidgets -I/30/qt5/qtbase/include/QtGui/5.15.0 -I/30/qt5/qtbase/include/QtGui/5.15.0/QtGui -I/30/qt5/qtbase/include/QtCore/5.15.0 -I/30/qt5/qtbase/include/QtCore/5.15.0/QtCore -I/30/qt5/qtbase/include -I/30/qt5/qtbase/include/QtWidgets -I/30/qt5/qtbase/include/QtGui -I/30/qt5/qtbase/include/QtCore -I/30/qt5/qtbase/include/QtZlib -I/30/qt5/qtbase/include/QtZlib/5.15.0 -I/30/qt5/qtbase/include/QtZlib/5.15.0/QtZlib -I.moc -I/usr/include/libdrm -I/usr/include/xcb -I/usr/include/xcb -I/30/qt5/qtbase/mkspecs/linux-g++ -o .obj/qsvgfont.o qsvgfont.cpp
In file included from /30/qt5/qtbase/include/QtGui/qopenglversionfunctions.h:1,
                 from /30/qt5/qtbase/include/QtGui/../../src/gui/kernel/qopenglcontext.h:61,
                 from /30/qt5/qtbase/include/QtGui/qopenglcontext.h:1,
                 from /30/qt5/qtbase/include/QtGui/QtGui:49,
                 from ../../include/QtSvg/QtSvgDepends:4:
/30/qt5/qtbase/include/QtGui/../../src/gui/opengl/qopenglversionfunctions.h: In instantiation of ‘class QVector<double>’:
qsvgstyle_p.h:696:20:   required from here
/30/qt5/qtbase/include/QtGui/../../src/gui/opengl/qopenglversionfunctions.h:201:5: internal compiler error: in tsubst_function_decl, at cp/pt.c:12967
  201 |     QAbstractOpenGLFunctionsPrivate()
      |     ^~~~~~~~~~~~~~~~~~~~~~~~~~~~~~~
Please submit a full bug report,
with preprocessed source if appropriate.
See <http://bugzilla.redhat.com/bugzilla> for instructions.
make[3]: *** [.obj/qsvgfont.o] Error 1
make[3]: Leaving directory `/30/qt5/qtsvg/src/svg'
make[2]: *** [sub-svg-make_first-ordered] Error 2
make[2]: Leaving directory `/30/qt5/qtsvg/src'
make[1]: *** [sub-src-make_first] Error 2
make[1]: Leaving directory `/30/qt5/qtsvg'
make: *** [module-qtsvg-make_first] Error 2
Instalamos versões adicionais de pacotes e na tentativa 3 conseguimos:
-
yum install harfbuzz-devel yum install at-spi2-atk-devel at-spi2-core-devel dbus-devel glib2-devel graphite2-devel keyutils-libs-devel krb5-devel libcom_err-devel libicu-devel libselinux-devel libsepol-devel libverto-devel pcre-devel zlib-devel-
yum install mesa-libGLw-devel
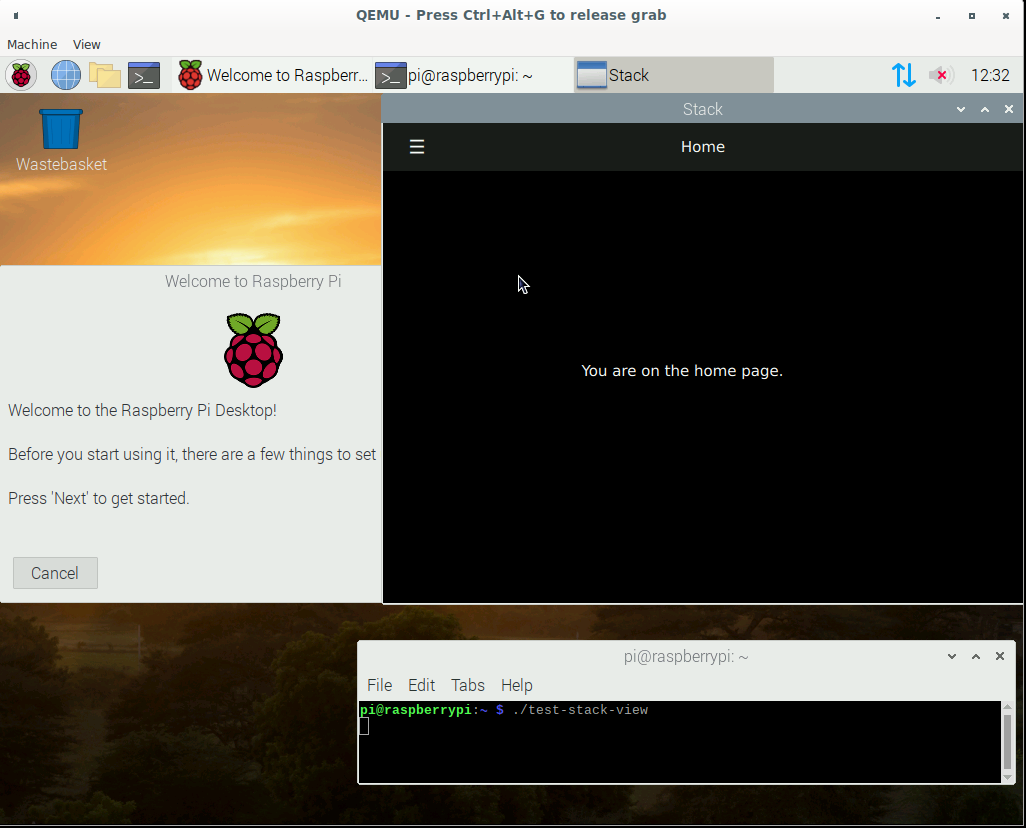
Configuração e montagem em andamento. Criamos um aplicativo de teste no QtCreator (com assembly qmake), copiamos os fontes para a máquina virtual e construímos o aplicativo. O binar está pronto, falta testá-lo no Raspberry.
2. Execute no emulador Raspberry
Como no âmbito deste artigo estamos emulando um processador ARM, isso significa que também executaremos em uma máquina virtual link 1 link 2 link 3 :
Baixe a imagem oficial do site do Raspberry, o kernel para o emulador e execute (criei esse arquivo de inicialização):
echo create disk for Qt sources and Projects
qemu-img create -f qcow2 qt-rebuild-25gb-disk.qcow2 25G
cat start-emul.sh
#!/bin/bash

path_img=/home/user/Project/qemu
path_kernel=/home/user/qemu/qemu-rpi-kernel
sudo qemu-system-arm -kernel $path_kernel/kernel-qemu-4.19.50-buster -dtb $path_kernel/versatile-pb-buster.dtb \
-cpu arm1176 -m 256 -M versatilepb -append "root=/dev/sda2 rw" -net nic -net user,hostfwd=tcp::5022-:22 \
-net tap,ifname=vnet0,script=no,downscript=no -hdb $path_img/qt-rebuild-25gb-disk.qcow2 -no-reboot -hda $path_img/2020-05-27-raspios-buster-armhf.img
Tentando lançar nosso aplicativo:
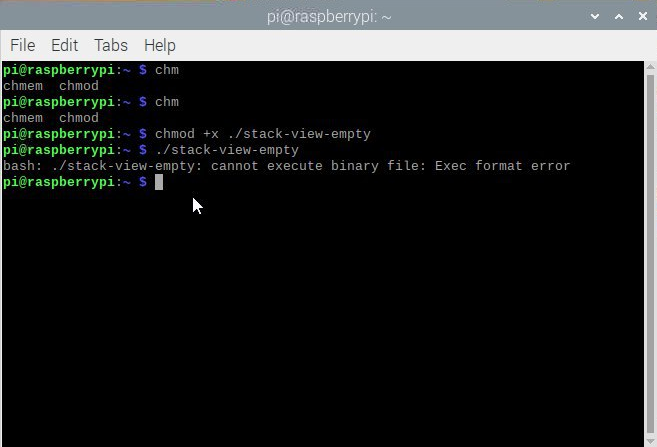
Por que isso? Vemos o processador:
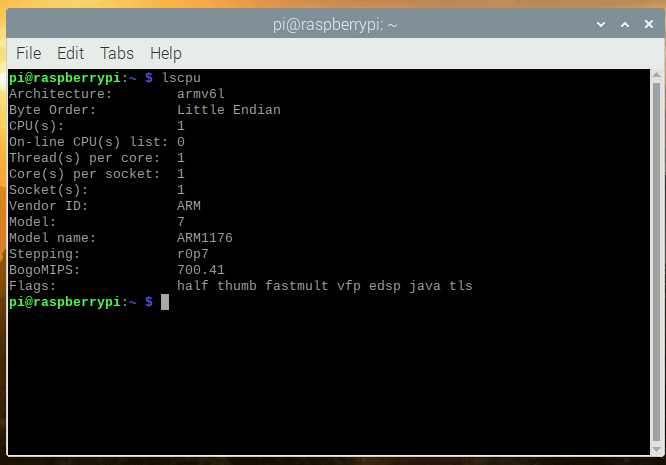
Vemos o arquivo de configuração no CentOS:
[root@aaarch-qemu qt5]# cat config.summary |grep CPU
Build type: linux-g++ (arm64, CPU features: cx16 neon)
Bem, compilamos um aplicativo armv8 de 64 bits e estamos tentando executá-lo em um emulador de 32 bits com um processador armv6. Espero que os proprietários de dispositivos reais com novos processadores de 64 bits consigam cancelar a inscrição nos comentários, independentemente de terem executado o aplicativo em um dispositivo real ou não.
Bem, não importa, agora podemos coletar no emulador do Raspberry? Descobrimos que temos muito pouco espaço livre em disco após chamar o comando df -h. A maneira mais fácil era copiar o arquivo de imagem, aumentá-lo, iniciar uma máquina virtual com dois sistemas de arquivos aumentando a partição raiz na segunda máquina e, em seguida, usar a segunda imagem. Ir:
qemu-img convert 2020-05-27-raspios-buster-armhf.img 2020-05-27-raspios-buster-armhf-10gb.qcow2 -O qcow2 -p
qemu-img resize 2020-05-27-raspios-buster-armhf-10gb.qcow2 +6G
Adicione outro disco rígido ao script de inicialização:
-hdc 2020-05-27-raspios-buster-armhf-10gb.qcow2
Após iniciar, edite este disco rígido sudo cfdisk / dev / sdc:
Redimensionar:

Escreva e confirme sim:
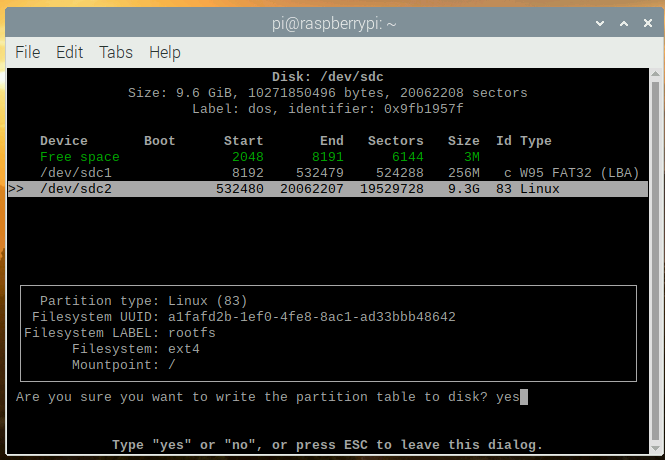
Não se esqueça de verificar, que o disco atingiu o tamanho que precisamos:
sudo mkdir /test
sudo mount /dev/sdc2 /test
df -h
Filesystem      Size  Used Avail Use% Mounted on
/dev/root       3.2G  2.8G  257M  92% /
devtmpfs        124M     0  124M   0% /dev
tmpfs           124M     0  124M   0% /dev/shm
tmpfs           124M  2.0M  122M   2% /run
tmpfs           5.0M     0  5.0M   0% /run/lock
tmpfs           124M     0  124M   0% /sys/fs/cgroup
/dev/sdc1       253M   51M  202M  21% /boot
tmpfs            25M     0   25M   0% /run/user/1000
/dev/sdc2       3.2G  2.7G  358M  89% /test
Algo do tamanho do disco sdc conectado à pasta / test não foi adicionado, vamos consertar:
sudo umount /test
sudo fsck -f /dev/sdc2
sudo resize2fs /dev/sdc2
resize2fs 1.44.5 (15-Dec-2018)
Please run 'e2fsck -f /dev/sdc2' first.

pi@raspberrypi:~ $ e2fsck -f /dev/sdc2
e2fsck 1.44.5 (15-Dec-2018)
e2fsck: Permission denied while trying to open /dev/sdc2
You must have r/w access to the filesystem or be root
pi@raspberrypi:~ $ sudo e2fsck -f /dev/sdc2
e2fsck 1.44.5 (15-Dec-2018)
Pass 1: Checking inodes, blocks, and sizes
Pass 2: Checking directory structure
Pass 3: Checking directory connectivity
Pass 4: Checking reference counts
Pass 5: Checking group summary information
rootfs: 106640/217296 files (0.3% non-contiguous), 729343/868352 blocks
pi@raspberrypi:~ $ sudo resize2fs /dev/sdc2
resize2fs 1.44.5 (15-Dec-2018)
Resizing the filesystem on /dev/sdc2 to 2441216 (4k) blocks.
The filesystem on /dev/sdc2 is now 2441216 (4k) blocks long.

sudo mount /dev/sdc2 /test
pi@raspberrypi:~ $ df -h
Filesystem      Size  Used Avail Use% Mounted on
/dev/root       3.2G  2.8G  259M  92% /
devtmpfs        124M     0  124M   0% /dev
tmpfs           124M     0  124M   0% /dev/shm
tmpfs           124M  2.0M  122M   2% /run
tmpfs           5.0M     0  5.0M   0% /run/lock
tmpfs           124M     0  124M   0% /sys/fs/cgroup
/dev/sdc1       253M   51M  202M  21% /boot
tmpfs            25M     0   25M   0% /run/user/1000
/dev/sdc2       9.2G  2.7G  6.0G  31% /test
Desligue a máquina virtual. Edite o arquivo start-emul.sh novamente, substituindo o disco rígido hda por um novo e removendo o link para o terceiro disco rígido -hdc. Agora temos um sistema de arquivos com mais espaço.
Agora podemos conectar o disco rígido com fontes Qt da primeira máquina virtual.
Conselho: é melhor "limpar as fontes" dos arquivos temporários, ou seja, retorna o nosso estado do git, que estava no momento da clonagem do repositório antes de configurar:
cd /30/qt5
git reset --hard
git submodule foreach --recursive 'git reset HEAD . || :'
git submodule foreach --recursive 'git checkout -- . || :'
git clean -d -f -f -x
git submodule foreach --recursive git clean -d -f -f -x
Então, no Debian, precisamos:
sudo apt install gcc-arm-none-eabi
sudo apt install wget build-essential \
 ^libxcb.*-dev \
libopenal-dev \
flite1-dev   libspeechd-dev \
libudev-dev \
libinput-dev \
libxkbcommon-x11-dev curl libssl-dev time -y

sudo apt install libx11-dev -y \
    libfontconfig1-dev \
    libfreetype6-dev \
    libx11-dev \
    libxext-dev \
    libxfixes-dev \
    libxi-dev \
    libxrender-dev \
    libxcb1-dev \
    libx11-xcb-dev \
    libxcb-glx0-dev \
    libxkbcommon-x11-dev \
    mesa-common-dev \
libgl1-mesa-dev
Configurando:
cd /30/qt5
./configure -skip qt3d -no-warnings-are-errors -release -recheck-all -prefix /Qt/5.15.0 -opensource -confirm-license -nomake examples -nomake tests -c++std c++17 -I /usr/include/xcb/ -L /usr/lib/x86_64-linux-gnu/ -xcb-xlib -xcb -feature-thread -feature-xkbcommon -qt-libpng -qt-libjpeg -qt-zlib -I /usr/include/xcb/ -L /usr/lib/x86_64-linux-gnu/ --recheck-all -skip wayland -skip qtwebengine -skip qtwayland
Também obtendo erros:
ERROR: Feature 'xcb-xlib' was enabled, but the pre-condition 'features.xlib && libs.xcb_xlib' failed.

ERROR: The OpenGL functionality tests failed!
You might need to modify the include and library search paths by editing QMAKE_INCDIR_OPENGL[_ES2],
QMAKE_LIBDIR_OPENGL[_ES2] and QMAKE_LIBS_OPENGL[_ES2] in the mkspec for your platform.
Conselho. Você digitou esses comandos na janela gráfica do QEMU? Não se esqueça, temos ssh: você precisa iniciar na máquina virtual do servidor ssh: sudo systemctl start ssh && sudo systemctl habilitar ssh e conectar-se à máquina virtual a partir do computador local ssh pi @ localhost -p 5022 usuário pi senha raspberry
Instale outros pacotes dev:
sudo apt install wget build-essential  ^libxcb.*-dev libopenal-dev flite1-dev   libspeechd-dev libudev-dev libinput-dev libxkbcommon-x11-dev curl libssl-dev time -y
sudo apt install libasound2-dev libavcodec-dev libclipper-dev libdbus-1-dev libdrm-dev libegl-dev libgles2-mesa-dev
sudo  apt install libx11-dev libfontconfig1-dev libfreetype6-dev libx11-dev libxext-dev libxfixes-dev libxi-dev libxrender-dev libxcb1-dev libx11-xcb-dev libxcb-glx0-dev libxkbcommon-x11-dev mesa-common-dev libgl1-mesa-dev
Configuramos e obtemos a saída dos resultados da configuração:
time ./configure -skip qt3d -no-warnings-are-errors -release -recheck-all -prefix /Qt/5.15.0 -opensource -confirm-license -nomake examples -nomake tests -c++std c++17 -I /usr/include/xcb/ -L /usr/lib/x86_64-linux-gnu/ -xcb-xlib -xcb -feature-thread -feature-xkbcommon -qt-libpng -qt-libjpeg -qt-zlib -I /usr/include/xcb/ -L /usr/lib/x86_64-linux-gnu/ --recheck-all -skip wayland -skip qtwebengine -skip qtwayland
............Done.
Info: creating super cache file /30/qt5/.qmake.super
Info: creating cache file /30/qt5/.qmake.cache
Info: creating stash file /30/qt5/.qmake.stash
This is the Qt Open Source Edition.
You have already accepted the terms of the Open Source license.
Running configuration tests…
…
Note: Option 'cache_use' with value 'none' was specified twice
Note: Also available for Linux: linux-clang linux-icc
Note: Disabling X11 Accessibility Bridge: D-Bus or AT-SPI is missing.
WARNING: QDoc will not be compiled, probably because libclang could not be located. This means that you cannot build the Qt documentation.
Either ensure that llvm-config is in your PATH environment variable, or set LLVM_INSTALL_DIR to the location of your llvm installation.
On Linux systems, you may be able to install libclang by installing the libclang-dev or libclang-devel package, depending on your distribution.
On macOS, you can use Homebrew's llvm package.
On Windows, you must set LLVM_INSTALL_DIR to the installation path.
Qt is now configured for building. Just run 'make'.
Once everything is built, you must run 'make install'.
Qt will be installed into '/Qt/5.15.0'.
Prior to reconfiguration, make sure you remove any leftovers from
the previous build.
real 91m49.471s
user 78m43.608s
sys 7m22.934s
Exibindo informações sobre o resultado da configuração Para
quem já leu até este ponto e ainda tem entusiasmo para experimentá-lo, seria interessante obter seu resultado
Agora, 1 núcleo do seu computador levará muito tempo para construir o Qt e possivelmente construir, e talvez apareça um erro de que não há memória suficiente ou um erro durante a construção. Para fazer isso, recomendo criar um arquivo de troca de 1-1,5 Gb e conectá-lo:
sudo dd if=/dev/zero of=/30/swap1500 bs=256M count=6 status=progress
dd: memory exhausted by input buffer of size 268435456 bytes (256 MiB)

sudo dd if=/dev/zero of=/30/swap1500 bs=128M count=12 status=progress
1610612736 bytes (1.6 GB, 1.5 GiB) copied, 82 s, 19.6 MB/s
12+0 records in
12+0 records out
1610612736 bytes (1.6 GB, 1.5 GiB) copied, 82.223 s, 19.6 MB/s

sudo chmod 600 /30/swap1500
sudo mkswap /30/swap1500
Setting up swapspace version 1, size = 1.5 GiB (1610608640 bytes)
no label, UUID=af79f154-6904-4b6d-8c1d-61890bdda556

sudo swapon /30/swap1500

free
              total        used        free      shared  buff/cache   available
Mem:         252228       24652      142532         536       85044      179184
Swap:       1675256       69888     1605368
Coletamos e instalamos:
make && sudo make installSe módulos adicionais forem necessários, podemos sempre adicioná-los, por exemplo, para qtquickcontrols2:
export PATH=/Qt/5.15.0/bin:$PATH
cd /30/qt5/qtuickcontrols2/
qmake
make && sudo make install
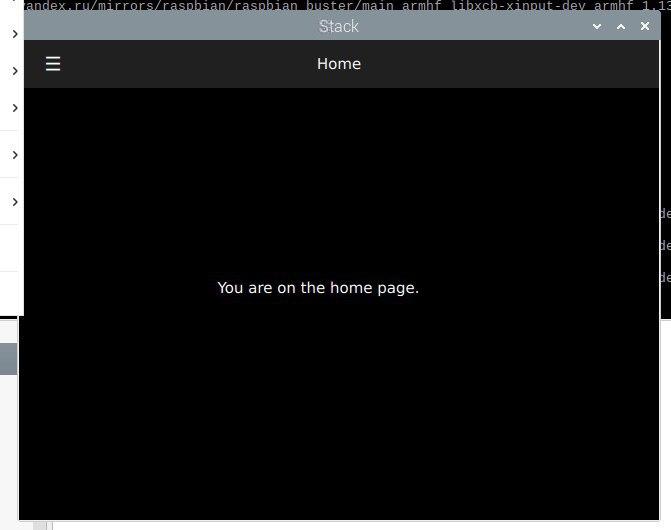
Depois disso, coletamos o aplicativo e o lançamos:
Conclusão
É possível construir aplicativos para ARM em dispositivos x86 usando o emulador QEMU. Pensei em escrever este artigo em uma semana, mas o processo se arrastou por quase três semanas, porque cada uma das etapas leva muito tempo (instalação do sistema, atualização do sistema, instalação de pacotes dev, bem como obter os códigos-fonte Qt do github). Por exemplo, construir a versão estática do Qt no emulador Raspberry levou 1426 minutos.
É mais rápido? Sim, é chamado de Cross build. Para fazer isso, configure o sysroot, instale um compilador ARM, configure e construa o Qt em seu sistema host. Em seguida, eles configuram o QtCreator para usar esta versão do Qt e constroem o aplicativo em seu computador / laptop x86, obtendo uma versão que funcionará em Linux embarcado. link 1 link 2Porque isso já está além do escopo deste artigo, talvez eu escreva sobre isso se tiver tempo ou inspiração, mas talvez outra pessoa escreva como fazer isso para a última versão do Qt 5.15.
Bem, repito, se alguém quiser repetir os passos do segundo capítulo para o emulador ARM Raspberry, então você pode escrever quanto tempo leva para construir o qmake e o estágio de configuração, indicando seu processador nos comentários.
Obrigado pela atenção. Boa sorte com sua criatividade!